

Nail Art Step by Step: Valentine's Day Negative Space Heart Nails
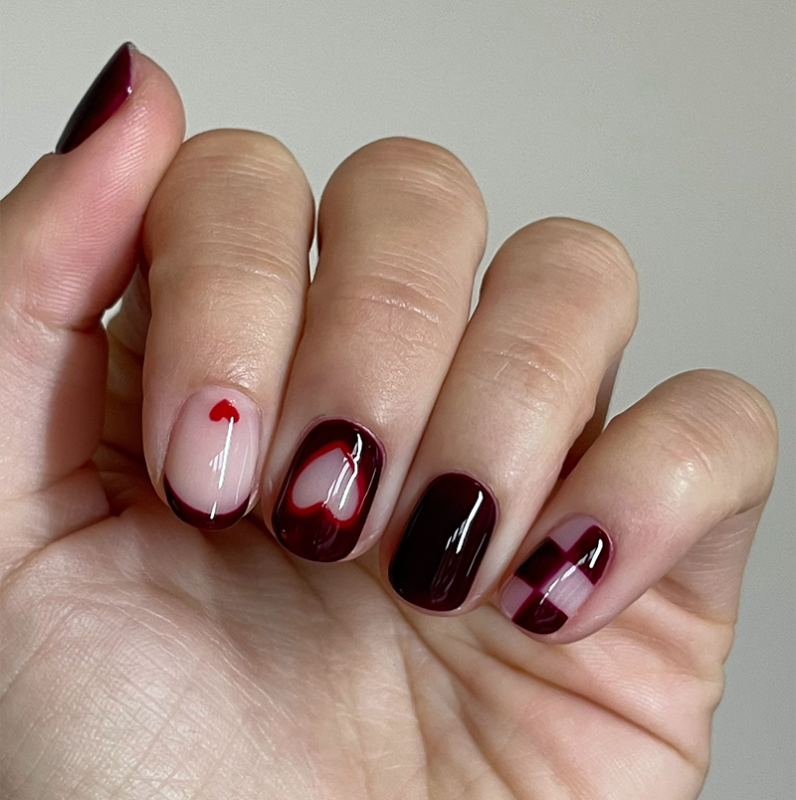
Nail expert Jaz Moger has created these romantic Negative Space Heart nails using her favourite Salon System Gellux shades. Follow her step-by-step guide to recreate these and share the love this Valentine's…

Step #1: Prep the nails. File to a soft square shape, push back the cuticle and buff the nail plate. Cleanse nails with Gellux Prep + Wipe, apply a coat of Gellux Warm Pink Builder Gel and cure for 60 seconds.
Step #2: Apply two to three coats of Gellux Black Cherry onto the thumb and ring finger, curing between each layer.
Step #3: Using a fine liner nail art brush, paint a French tip with Gellux Black Cherry on the index finger. This may need two to three coats. Cure for 60 seconds.
Step #4: Using Gellux Black Cherry and a fine liner nail art brush, paint a line vertically down the middle of the little nail. Next, paint two lines across to start creating the checkerboard and cure.
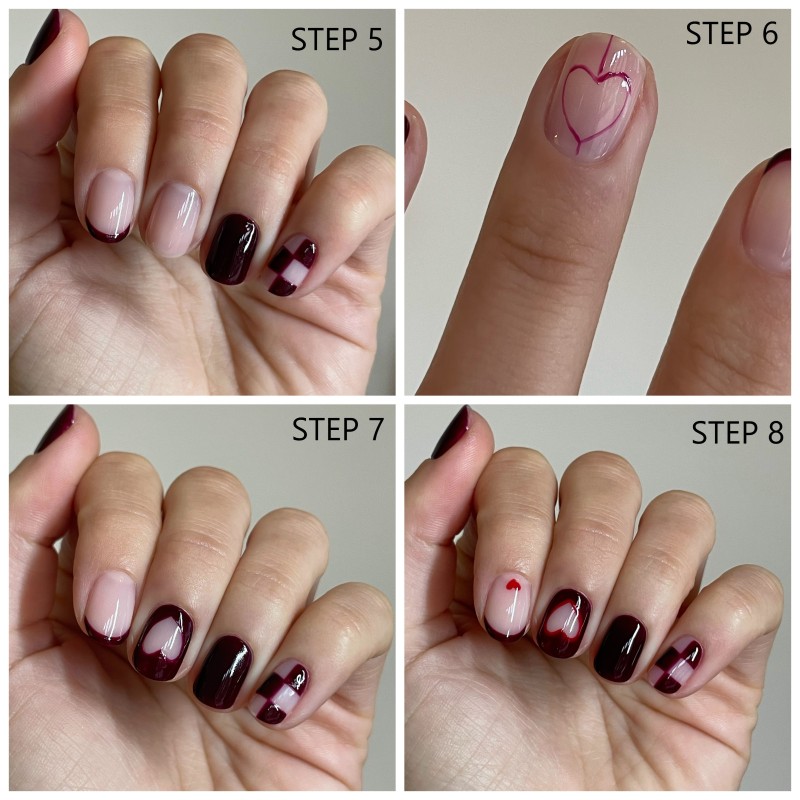
Step #5: Fill in the checkerboard with the same Gellux shade and cure between each layer. This may take two to three coats.
Step #6: Once again, apply once Gellux Black Cherry and begin to paint the negative space heart on the middle finger. I like to start with two lines in the middle of the nail and then draw each side of the heart and cure.
Step #7: Next, start to fill in the outside of the heart and cure.
Then paint another coat around the outside of the heart using Gellux Black Cherry and cure.
Step #8: Using Gellux Really Red, paint an outline around the negative space heart and cure. Next, using a dotting tool and fine liner nail art brush, create the small heart at the cuticle on the index finger and cure.
Finish with a coat of Gellux Clear Base/Top Coat, cure and then wipe over the nails with Gellux Prep + Wipe followed by a nourishing cuticle oil.